Project 4: Digital Visioning Webcam Art
In this project, we're going to make Processing "see" the world through a webcam and alter the resulting image in real time.
Artists Adrien M & Claire B use this technique in their "XYZT" installation to create a surreal funhouse mirror.
Camille Utterback uses code to make live video interactive in "Text Rain".
On the web, Olivia Jack's Selfie Apocalypse plays a wild variety of interactive tricks with your webcam.
Artists Adrien M & Claire B use this technique in their "XYZT" installation to create a surreal funhouse mirror.
Camille Utterback uses code to make live video interactive in "Text Rain".
On the web, Olivia Jack's Selfie Apocalypse plays a wild variety of interactive tricks with your webcam.
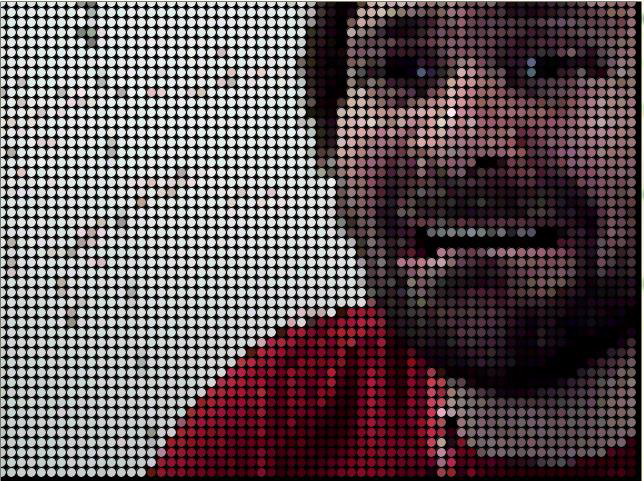
TUTORIAL
1. Before we load in a camera image, we're going to learn about loops in code. Loops let you repeat a command multiple times, while only typing it once, and are thus really useful for long, repetitive tasks like, say, going through every pixel of an image and changing its color.
We're going to start by using a 'for loop' to draw a line of white circles on the screen. For loops are stuctured like this:
For example, the code below sets a counter variable (named 'counter') to '0', then repeats, adding 1 to the counter each time ('counter++' is shorthand for 'add 1 to counter'), as long as the counter is smaller than the screen width. Each repetition, it draws an ellipse on screen, at the x position of the 'counter' variable. This will end up drawing ellipses across the screen, from x=0 to x=500.
2. Very basic, right? We just drew a fat line. Let's space out those ellipses into a chain of polka-dots. We're going to tweak the code to only draw a dot every twenty pixels. (We'll also add random colors for pizazz!)
To space out our dots, we're going to use the modulus operator (%). The modulus (%) operator gives us the remainder when dividing two numbers, e.g.:
5 % 2 = 1
◉◉|◉◉|◉
6 % 4 = 2
◉◉◉◉|◉◉
10 % 5 = 0
◉◉◉◉◉|◉◉◉◉◉
This means we can look for a modulus (%) of zero to check if a number is divisible by another.
Below, we've added an 'if' statement that uses the modulus operator (%) to only draw ellipses at x positions that are divisible by 20 (e.g. 20, 40, 60...).
3. Now, by 'nesting' a for loop inside of another, we can traverse the screen horizontally AND vertically, filling the whole screen with ellipses.
To do this, we'll also create two counter variables, 'counterx' and 'countery', that each loop will use. The outer loop will use 'countery' to move vertically down the screen. And each time it loops, it will run the second loop inside of it, which will use counterx to draw ellipses across the screen. Together, it will move down and across, filling the screen wth dots.
4. We can use mouseX and mouseY here, like we would any other code, to affect things like shape size, position, and color. Here, we’ll use a function called dist() to measure the distance between the mouse and each ellipse, and change the ellipse size based on mouse closeness.
Note that, now that things will be moving and interacting, we've had to organize the code into setup() and draw() functions.
(We also added counterx and countery to the fill color values to make things more visually interesting! Now the red and green values of each ellipse are determined by its horizontal and vertical placement.)
5. Now we're going to set that code aside, and introduce the code for loading images from a webcam, and displaying them on the screen. From this point forward, the images on the right will just be still images, not functional programs, since we can't have multiple Processing windows all pulling from the webcam on the same website.
We're going to import Processing's video library in the first line of code. This is a set of code that does the technical work to get the image from the camera, and it gives us some commands we can use to display and change that image. These commands include video.read() and video.start(), used below.
The below program simply grabs frames from the webcam and displays them onscreen. Read the comments (after the "//" lines ) to see what each line of code does.

6. Next, we'll add a single line of code, a filter() command, to add a simple visual effect to our video. We've made a super-basic Instagram filter!

8. The below example combines everything we've done with loops and video.
It extracts the color values of the pixels, like above, but uses them to color shapes, which are drawn using a loop and modulus, like the earlier loop examples.
One new thing the below code needs to do is use the video.pixels array, which is basically just a long list of colors in a single line, to color and place shapes on a 2D screen where the pixels are arranged in several rows. We can use division (/) to find our y value, and modulus (%) to find our x. Here's a detailed description of how that works, but if it loses you, feel free to just scroll down to the code and test it out.
Imagine our screen was just 6 pixels wide and 5 tall. The pixels[] array would look like 30 pixels in a line:
These correspond to 5 rows, each containing 6 pixels:
Which make this "screen" of pixels:
Imagine we were using a loop to traverse this array. We get to pixel 8, and find that it is orange. But we need to figure out where on the screen, in x and y, to draw the orange pixel (or ellipse, in the below program).
If we divide 8 (the current pixel) by 6 (the width of the screen), and ignore any remainder, we get the y value (or row) of the pixel:
8 / 6 = 1r 2
If we use the modulus, we get just the remainder, which is the x value (or column) of the pixel:
8 % 6 = 2
Which would place the orange pixel here on our little screen, at (2, 1):
Okay, all pixel talk aside, let's look at the example. Read the comments to see what each line of code exactly does to create the effect on the right.

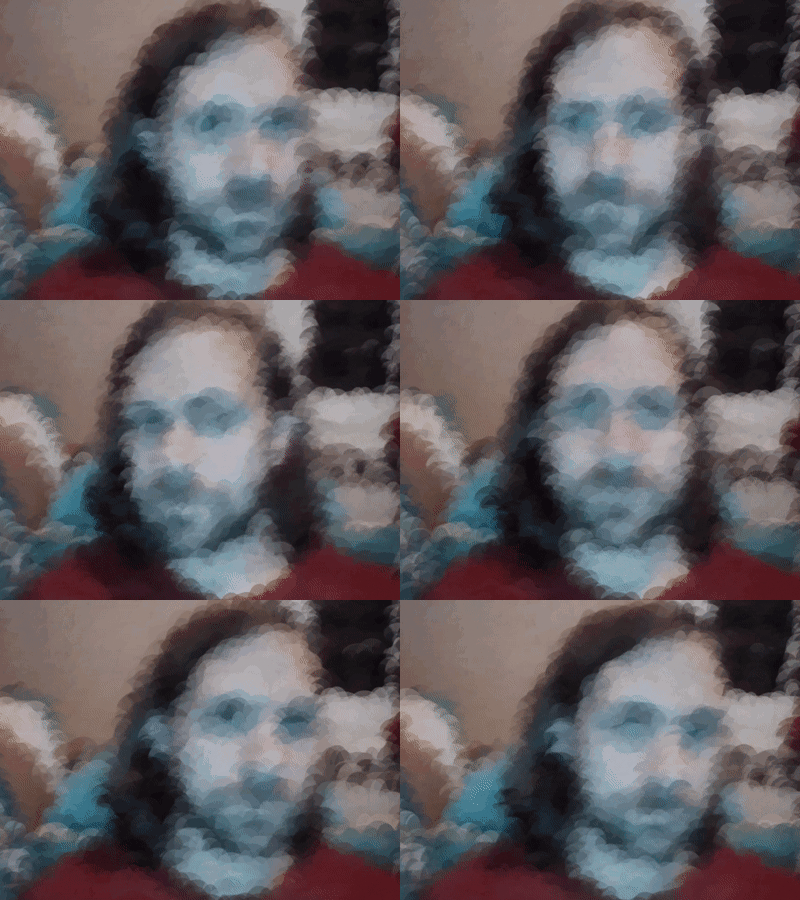
9. By adding just a few tweaks to how we draw the ellipses, we can make a more stylized image. Here we'll randomize the size of the ellipses every frame, and make them semitransparent, so they'll overlap and jitter to create a kind of animated painting effect.

Now that we've played with several different ways of manipulating the image from a webcam, it's time for you to come up with your own webcam artwork! Look below for some examples, and a specific assignment/prompt.
We're going to start by using a 'for loop' to draw a line of white circles on the screen. For loops are stuctured like this:
for (
A starting point, usually a counter variable at 0.
,
A condition. The code will keep looping while this is true. Usually this sets a max the counter will reach before it stops.
,
An instruction to do each loop, usually just adding one to the counter.
)

{
Code to repeat each loop
}
For example, the code below sets a counter variable (named 'counter') to '0', then repeats, adding 1 to the counter each time ('counter++' is shorthand for 'add 1 to counter'), as long as the counter is smaller than the screen width. Each repetition, it draws an ellipse on screen, at the x position of the 'counter' variable. This will end up drawing ellipses across the screen, from x=0 to x=500.
size (400, 400);

int counter;

//draws ellipses across screen
for (counter=0; counter <=width; counter++){
fill(255, 100);
noStroke();

//draw each ellipse, using 'counter' for the x position
ellipse(counter, 50, 20, 20);
}
2. Very basic, right? We just drew a fat line. Let's space out those ellipses into a chain of polka-dots. We're going to tweak the code to only draw a dot every twenty pixels. (We'll also add random colors for pizazz!)
To space out our dots, we're going to use the modulus operator (%). The modulus (%) operator gives us the remainder when dividing two numbers, e.g.:
5 % 2 = 1
◉◉|◉◉|◉
6 % 4 = 2
◉◉◉◉|◉◉
10 % 5 = 0
◉◉◉◉◉|◉◉◉◉◉
This means we can look for a modulus (%) of zero to check if a number is divisible by another.
Below, we've added an 'if' statement that uses the modulus operator (%) to only draw ellipses at x positions that are divisible by 20 (e.g. 20, 40, 60...).
size (400, 400);

int counter;

//draws ellipses across screen
for (counter=0; counter <=width; counter++){
	fill(random(255), random(255), random(255));
	noStroke();

	//draw an ellipse if 'counter' is divisible by 20
	if(counter%20 == 0) ellipse(counter, 50, 20, 20);
}
3. Now, by 'nesting' a for loop inside of another, we can traverse the screen horizontally AND vertically, filling the whole screen with ellipses.
To do this, we'll also create two counter variables, 'counterx' and 'countery', that each loop will use. The outer loop will use 'countery' to move vertically down the screen. And each time it loops, it will run the second loop inside of it, which will use counterx to draw ellipses across the screen. Together, it will move down and across, filling the screen wth dots.
size (400, 400);

background(0);

int counterx;
int countery;

//loop that moves down screen vertically
//to draw each line of dots

for (countery=0; countery <=height; countery++){

	//loop that moves across each line, drawing dots
	for (counterx=0; counterx<=width; counterx++){
		fill(random(255), random(255), random(255));
		noStroke();
		if(counterx%20 == 0 && countery%20==0){
			ellipse(counterx, countery, 20, 20);
		}
	}
}
4. We can use mouseX and mouseY here, like we would any other code, to affect things like shape size, position, and color. Here, we’ll use a function called dist() to measure the distance between the mouse and each ellipse, and change the ellipse size based on mouse closeness.
Note that, now that things will be moving and interacting, we've had to organize the code into setup() and draw() functions.
(We also added counterx and countery to the fill color values to make things more visually interesting! Now the red and green values of each ellipse are determined by its horizontal and vertical placement.)
void setup(){
size(400, 400);
}

void draw(){
background(0);

int counterx;
int countery;

for (countery=0; countery<=height; countery++){
	for (counterx=0; counterx<=width; counterx++){

		fill(counterx, countery, 0, 100);
		noStroke();

		if (counterx%20 == 0 && countery%20==0){

		//create a variable called 'distance' that
		//contains the distance between the mouse
		//and the current ellipse being drawn...

		float distance = dist (counterx, countery, mouseX, mouseY);

		//...and use that value to change the value of
		//a variable called 'size' which we'll use as
		//the width and height of the ellipse

		float size = map(distance, 0, 500, 50, 5);
		ellipse(counterx, countery, size, size);
		}
	}
}
}
5. Now we're going to set that code aside, and introduce the code for loading images from a webcam, and displaying them on the screen. From this point forward, the images on the right will just be still images, not functional programs, since we can't have multiple Processing windows all pulling from the webcam on the same website.
We're going to import Processing's video library in the first line of code. This is a set of code that does the technical work to get the image from the camera, and it gives us some commands we can use to display and change that image. These commands include video.read() and video.start(), used below.
The below program simply grabs frames from the webcam and displays them onscreen. Read the comments (after the "//" lines ) to see what each line of code does.
//import the video library
import processing.video.*;

//create a new 'Capture' object
//named 'video' to load frames
//from the camera
Capture video;

void setup(){
	size(640, 480);
	//set 'video' to capture a 640x480 frame
	video = new Capture(this, width, height);
	video.start(); // start the camera
	video.read();//start reading images from camera
}
void draw(){
	if (video.available()){//if camera has a frame for us
		video.read(); // read a new frame from camera
		image(video, 0, 0); //draw frame to screen
	}
}

6. Next, we'll add a single line of code, a filter() command, to add a simple visual effect to our video. We've made a super-basic Instagram filter!
//import the video library
import processing.video.*;

//create a new 'Capture' object
//named 'video' to load frames
//from the camera
Capture video;

void setup(){
	size(640, 480);
	//set 'video' to capture a 640x480 frame
	video = new Capture(this, width, height);
	video.start(); // start the camera
	video.read();//start reading images from camera
}
void draw(){
	if (video.available()){//if camera has a frame for us
		video.read(); // read a new frame from camera
		image(video, 0, 0); //draw frame to screen
		filter(POSTERIZE,3); // add a visual effect
	}
}

7. Now we're going to get a little more technical. We're going to use a for loop to travel through every pixel of the image, and replace any dark pixels with neon green, to create a sort of solarized pop-art effect.
This is a pretty basic pixel manipulation, but once you've done it you can go further, altering the colors in different ways.
To do this, we're going to use a function called loadPixels, which pulls the pixels out of an image and puts them into an array. An array is basically a list in computer code, and you can access any item in that list using square brackets [] like so:
//I have an array named 'image.pixels,' which contains the pixels of an image named 'image'
image.pixels[0] = color(0,0,0); //set the first pixel, #0, to color black

image.pixels[50] = color(0,255,0); //set the 51st pixel, #50, to color black

int counter=0;
for (counter = 0; counter < image.width*image.height; counter++){ //a for loop that moves through every pixel in 'image'
	image.pixels[counter] = color(random(255), random(255), random(255); //While going through the array, give each pixel a random color
}
You can have arrays of anything - integers, characters, strings of text, etc. But we'll just be dealing with an array of pixels which each contain a color.
//import the video library
import processing.video.*;

//create a new 'Capture' object
//named 'video' to load frames
//from the camera
Capture video;

void setup(){
	size(640, 480);
	//set 'video' to capture a 640x480 frame
	video = new Capture(this, width, height);
	video.start(); // start the camera
	video.read();//start reading images from camera
}
void draw(){
	if (video.available()){//if camera has a frame for us
		video.read(); // read a new frame from camera


		//load the pixels of the video image
		//into an array named 'video.pixels'
		video.loadPixels();

		int counter;
		//use a loop to travel through every pixel
		for (counter = 0; counter < video.width*video.height; counter++){

			//store the rgb values of the
			//current pixel in variables
			float r = red(video.pixels[counter]);
			float g = green(video.pixels[counter]);
			float b = blue(video.pixels[counter]);

			//use a loop to travel through every pixel
			//and if the sum of its RGB values is less
			//than 100, replace it with neon green.
			if (r+g+b < 100){
			video.pixels[counter] = color(0,255,0);
			}
		}
		image(video, 0, 0); //draw frame to screen
	}
}

8. The below example combines everything we've done with loops and video.
It extracts the color values of the pixels, like above, but uses them to color shapes, which are drawn using a loop and modulus, like the earlier loop examples.
One new thing the below code needs to do is use the video.pixels array, which is basically just a long list of colors in a single line, to color and place shapes on a 2D screen where the pixels are arranged in several rows. We can use division (/) to find our y value, and modulus (%) to find our x. Here's a detailed description of how that works, but if it loses you, feel free to just scroll down to the code and test it out.
Imagine our screen was just 6 pixels wide and 5 tall. The pixels[] array would look like 30 pixels in a line:
| 0 | 1 | 2 | 3 | 4 | 5 | 6 | 7 | 8 | 9 | 10 | 11 | 12 | 13 | 14 | 15 | 16 | 17 | 18 | 19 | 20 | 21 | 22 | 23 | 24 | 25 | 26 | 27 | 28 | 29 |
These correspond to 5 rows, each containing 6 pixels:
| 0 | 1 | 2 | 3 | 4 | 5 | 6 | 7 | 8 | 9 | 10 | 11 | 12 | 13 | 14 | 15 | 16 | 17 | 18 | 19 | 20 | 21 | 22 | 23 | 24 | 25 | 26 | 27 | 28 | 29 |
Which make this "screen" of pixels:
| 0 | 1 | 2 | 3 | 4 | 5 | |
| 0 | ||||||
| 1 | ||||||
| 2 | ||||||
| 3 | ||||||
| 4 |
Imagine we were using a loop to traverse this array. We get to pixel 8, and find that it is orange. But we need to figure out where on the screen, in x and y, to draw the orange pixel (or ellipse, in the below program).
| 0 | 1 | 2 | 3 | 4 | 5 | 6 | 7 | 8 | 9 | 10 | 11 | 12 | 13 | 14 | 15 | 16 | 17 | 18 | 19 | 20 | 21 | 22 | 23 | 24 | 25 | 26 | 27 | 28 | 29 |
If we divide 8 (the current pixel) by 6 (the width of the screen), and ignore any remainder, we get the y value (or row) of the pixel:
8 / 6 = 1
If we use the modulus, we get just the remainder, which is the x value (or column) of the pixel:
8 % 6 = 2
Which would place the orange pixel here on our little screen, at (2, 1):
| 0 | 1 | 2 | 3 | 4 | 5 | |
| 0 | ||||||
| 1 | ||||||
| 2 | ||||||
| 3 | ||||||
| 4 |
Okay, all pixel talk aside, let's look at the example. Read the comments to see what each line of code exactly does to create the effect on the right.
import processing.video.*;

Capture video;

void setup(){
	size(640, 480);
	video = new Capture(this, width, height);
	video.start();
	video.read();
}

void draw(){
	if (video.available()){
		background(0);
		video.read(); // read a new frame from camera
		video.loadPixels();//extracts the pixel color into an array
		int counter;
		// notice we're counting up 10 at a time on this loop
		for (counter = 0; counter < width*height; counter +=10){

			// store the color from the pixel in a variable
			color pixelcolor = video.pixels[counter];

			// use that color to draw next shape
			fill(pixelcolor);

			// calculate what ‘column’ we’re on
			// by taking the modulus of our current
			// position in the pixel array over
			// the width of the screen
			int column = int(counter % width);

			// calculate what ‘row’ we’re on
			// by dividing our current
			// position in the pixel array by
			// the width of the screen
			int row = int(counter / width);

			 // draw the ellipse
			if (row%10==0) ellipse(column, row, 10, 10);
		}
	}
}

9. By adding just a few tweaks to how we draw the ellipses, we can make a more stylized image. Here we'll randomize the size of the ellipses every frame, and make them semitransparent, so they'll overlap and jitter to create a kind of animated painting effect.

import processing.video.*;

Capture video;

void setup(){
	size(640, 480);
	video = new Capture(this, width, height);
	video.start();
	video.read();
}

void draw(){
	if (video.available()){
		background(0);
		video.read(); // read a new frame from camera
		video.loadPixels();//extracts the pixel color into an array
		int counter;

		for (counter = 0; counter < width*height; counter +=10){

			// store the color from the pixel in a variable
			color pixelcolor = video.pixels[counter];

			pixelcolor = color(red(pixelcolor), green(pixelcolor), blue(pixelcolor), 100); // make color semitransparent

			fill(pixelcolor);
			noStroke();

			int column = int(counter % width);

			int row = int(counter / width);

			if (row%10==0) ellipse(column, row, random(20,50), random(20,50)); // random sizes on circles to make them jitter
		}
	}
}
Now that we've played with several different ways of manipulating the image from a webcam, it's time for you to come up with your own webcam artwork! Look below for some examples, and a specific assignment/prompt.
EXAMPLES
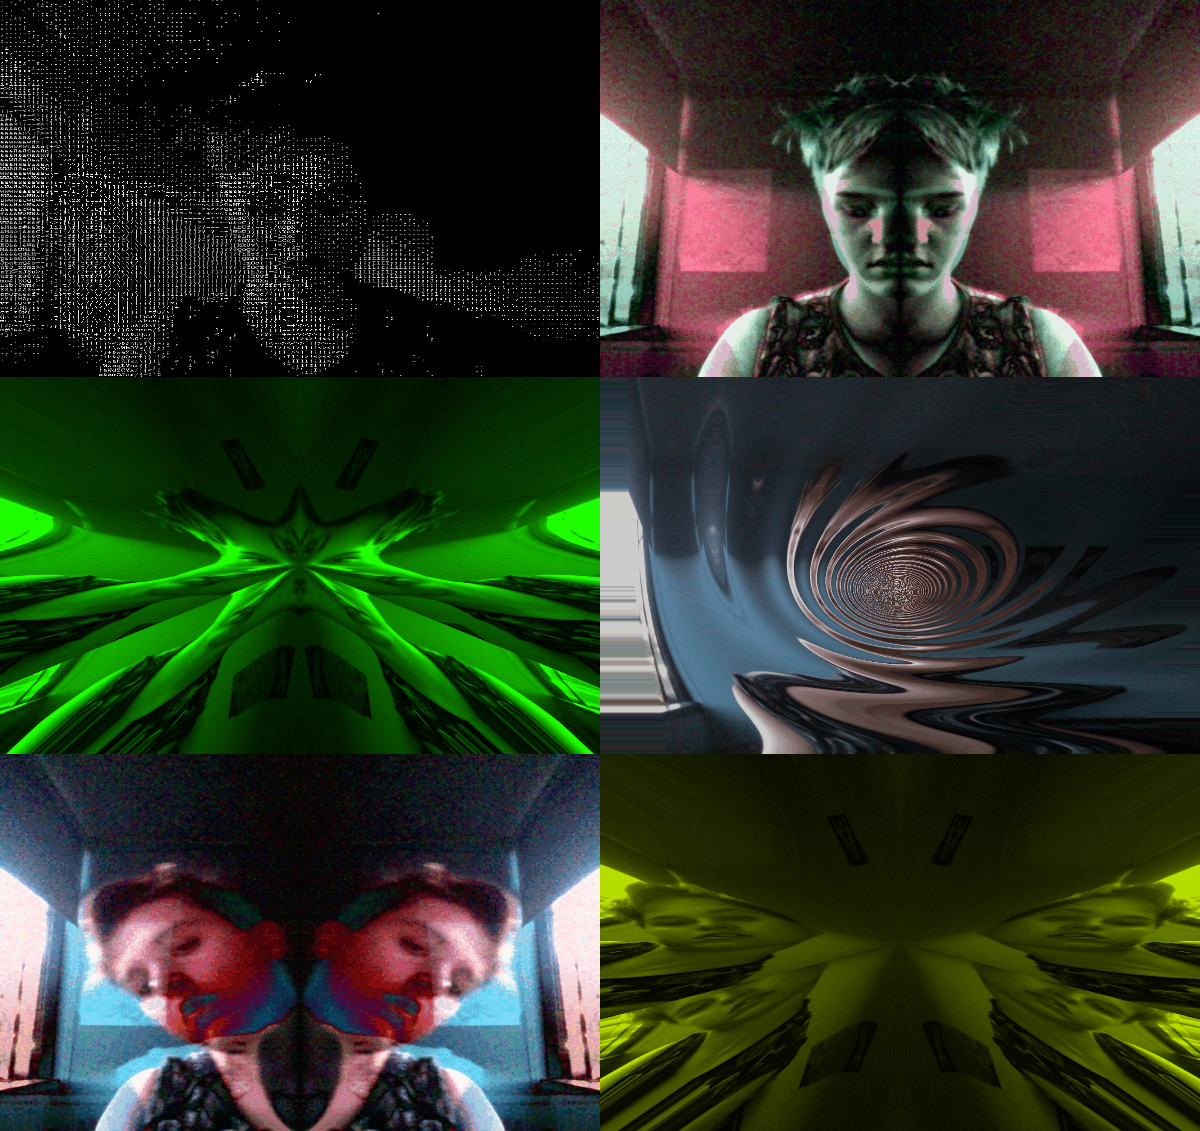
These examples (all made by students) show preview clips of the video effects they produce. Copy and paste the code into Processing to see their actual effect using your webcam.

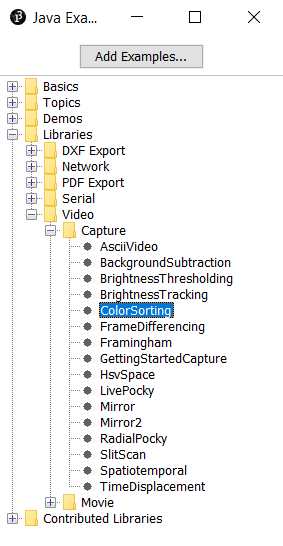
Processing also has several example webcam programs included, which you can find under File->Examples

Processing also has several example webcam programs included, which you can find under File->Examples
ASSIGNMENT
Processing Language Reference for more Processing commands
Rubric - Expectations and scoring for this assignment
Resources:
Reference "Cheat Sheet" for loops and camera image processingProcessing Language Reference for more Processing commands
Rubric - Expectations and scoring for this assignment
